
Build an automation in the editor
Create an automation step by step - choose a trigger, add steps, complete Setup, run a dry test and publish it safely.
This guide walks you through building an automation yourself in the automation editor, from a blank draft to a live automation. Use it when you know which event should start the automation, or when you want to finish a draft that Orbit or a template created.
Before you begin
- Permission: you need editing permission in the workspace. If you can only view, the editor shows View only.
- Connections: steps that send email, SMS, WhatsApp messages or calls need a connected account. Check Automations → Connections.
- Test data: have an internal test lead or form you can use. Don't test on real customers.
- Plan: some steps are premium. If your plan doesn't include one, you'll see Upgrade to activate or Start trial to activate instead of Publish.
Create a draft
Build manually
- Open Automations → All Automations and select New Automation.
- Select Build manually.
- If you see a Module list, choose the area the automation belongs to, such as CRM, Forms, Funnels or Webinars.
- Under Starting point, choose the event that should start it. For example, Form submission automation starts when a form is submitted.
- Check the Name. Use a name that says what happens, such as "Contact form → tag and task".
- Select Create Automation. The draft opens in the editor.
Starting points labelled Email create an email automation, which opens in the email automation builder instead of this editor.
Start from a template
- Open Automations → Templates.
- Search or filter, then select a template to preview its trigger and steps.
- Select Review setup to see which connections it needs.
- Select Create draft & open. The template opens as an editable draft.
Find your way around the editor
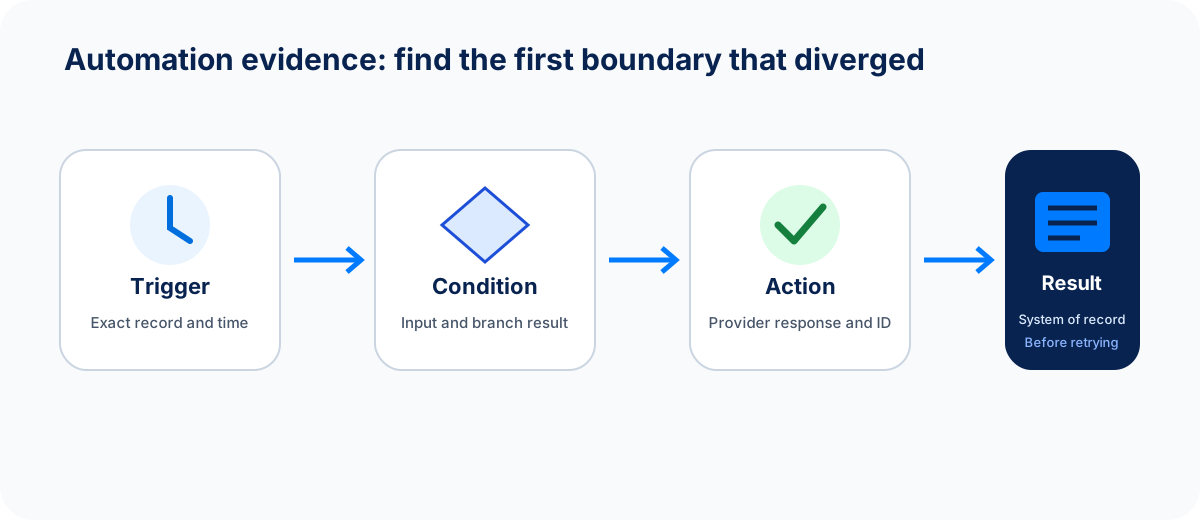
When you check a run, look at both the run and its result, such as the task or message. A step that fails later does not undo steps that already ran.
- Canvas: the trigger and steps, connected by lines. Use Zoom in, Zoom out, Fit canvas and Auto arrange to tidy the view. Press Ctrl + Z (⌘ + Z on a Mac) to undo a canvas change.
- Add step: opens the step library. Search with Find a step, then click a step to add it, or drag it onto the canvas.
- Readiness bar: three checks at the top, Setup, Issues and Test. Each shows whether it's ready.
- Save status: the editor saves as you work. It shows All changes saved, Unsaved changes or Save failed. Select Save now to save immediately.
- More automation actions: open History to see earlier versions, Refresh automation, or Pause live for an active automation.
Choose the trigger
Select the trigger at the top of the canvas and choose a Trigger Event. Common triggers include:
| Area | Triggers |
|---|---|
| CRM | Lead Created, Lead Updated, Status Changed, Stage Changed, Field Changed, Deal Won, Task Completed |
| Forms and funnels | Form Submitted, Funnel Opt-in |
| Chat & Voice | Message Received, Missed / Unanswered Call, Call Completed |
| Other | Appointment Booked, Purchase Completed, Webinar Registration, Webinar Attendance |
Changing the trigger later can break steps that rely on it, so choose it first.
Add steps
The step library groups steps into Conditions, Control and actions grouped by module. Some useful ones:
- Condition: checks a field and splits the path into true and false. You can also check Business hours.
- Switch: sends records down one of several paths.
- AI Classifier: sorts leads or messages with AI for free. See Free AI classifiers.
- Delay: waits a set time in seconds, minutes, hours, days or weeks.
- End: stops the path.
- Add Tag, Set Field, Set Status, Assign Owner, Create Task, Add Note, Create Deal.
- Send Email, Send SMS, Send WhatsApp, Call with AI Agent, Send Booking Link, Notify a Teammate, Call a Webhook.
- Enroll in Automation: adds the record to a published email automation.
Only steps that work with your trigger are shown. Select a step on the canvas to configure it in the side panel.
Use variables
Most text fields accept variables, such as the lead's first name or the form name. Use the variable picker rather than typing them. For a Form Submitted trigger, you can use Form Name, Answers, Created A New Lead and the lead's details. Think about what happens when a value is empty, for example a missing first name in an email greeting.
Complete Setup
Select Setup in the readiness bar. The Automation setup window lists the settings your steps need, such as:
- Task owner: Triggering user, Trigger record owner or a teammate.
- Task priority: Low, Medium, High or Urgent.
- Due in days (0 = today): leave it empty for no due date.
- Email sender and Email template for Send Email steps.
- AI voice agent and Caller number for call steps.
- Source form for a Form Submitted trigger.
Required settings shows how many you've chosen. Select Apply to draft. Only the settings you changed are saved, and nothing runs or goes live.
If the automation only creates tasks, Setup shows Task defaults instead of a connection count.
Worked example: when a form is submitted, tag the lead and create a task
- Create a draft from the Form submission automation starting point.
- Select Add step and add Add Tag below the trigger. Enter the tag website-enquiry.
- Add Create Task below it. Set Task Title to "Call new enquiry" and Related To to Trigger Record.
- Open Setup. Choose the Source form, set Task owner to Trigger record owner, Task priority to High and Due in days to 1. Select Apply to draft.
- Check the canvas. Choosing a source form adds an Only this form check after the trigger, with an Other forms: stop ending. Submissions from other forms stop there and do nothing.
- Test and publish as described below.
Choose the source form after you've added at least one step. Otherwise you'll see Connect a step after the trigger before choosing a source form.
Add or update a custom table row
If you use custom tables (objects) under CRM → Objects, you can add table steps. Depending on your plan, the step library can include Create custom table row, Update custom table row, Get custom table row and Find custom object records.
- Add the step and choose the Table.
- Fill in Row values. Each field matches the table's column type: numbers and currency accept decimals, yes/no fields show Yes or No, and choice fields list their options. For each field you can Use a variable or Use a fixed value.
- To update a row, map the row's ID and revision from an earlier table step. If a form adds rows to this table, use the form submission's Table Row ID and Table Row Revision.
- For an update, leave a field unset to keep its current value.
If someone changes the table's columns after you set up the step, the editor shows The table changed. Review its fields before accepting the current schema. Check the fields, then select Use reviewed schema.
Fix issues
Select Issues to see All automation issues, with errors and warnings for each step. Select an issue to jump to its step. You can't publish while there are errors.
Run a dry test
- Save the draft so the test result is kept.
- Select Test. The Test automation window opens.
- Under Sample data, edit the Sample trigger record · JSON with made-up values that match your trigger.
- Select Review safety. The dry run sends no emails, texts, WhatsApp messages or calls, changes no CRM records, tasks, tags or notes, and uses no automation credits.
- Select Run dry test.
- Check Results. Dry-run path complete means every step worked with your sample. Review failed steps shows where it stopped and why.
If you edit the draft after testing, the Test check shows Run again.
Publish
- Select Publish (or Publish changes for an automation that's already live).
- If the automation sends messages or places calls, confirm Publish automation?. It tells you how many actions each matching record can run.
- You'll see Automation published. The status changes to Active.
What you should see
- The automation shows Active in Automations → All Automations.
- After a matching event, a new run appears in Automations → Runs.
- The result shows up where you expect it: the tag on the lead, the task in the task list, or the message in the inbox.
If something goes wrong
| What you see | What to do |
|---|---|
| Publish does nothing and the issues list opens | Fix every error under Issues, then publish again. |
| Upgrade to activate replaces Publish | The draft uses a premium step. Upgrade, or replace the step. |
| Save failed | Check your connection, then select Save now. If someone else changed the automation, select Refresh automation. |
| The automation is active but nothing runs | Check the trigger and any Only this form or Condition checks. Confirm the test event matches. |
| Tables could not be loaded | Check that you can open CRM → Objects, then select Reload tables. |
For failed runs, see Runs and troubleshooting.
FAQ
Do edits to a live automation take effect immediately?
No. They're saved as a draft. The live version keeps running until you select Publish changes.
How do I stop an automation quickly?
Select Pause live in the editor, or Pause from the automation's menu in All Automations. New runs stop. Resume it when you're ready.
Can I reuse a group of steps?
Yes. Select the steps on the canvas, open the step library and save them under My blocks. You can then add that block to other automations from the same place.
Next step
Watch the first real runs in Runs and troubleshooting, or add AI sorting with Free AI classifiers.
Next step
Keep moving
Open the relevant Spacebrain screen or contact support if you need help.
Last updated on
Build an automation with Orbit
Describe an automation in plain language, review the plan Orbit drafts, save it, test it and open it in the editor. Nothing runs until you activate it.
Free AI classifiers
Use free AI Classifier steps to score leads, sort messages, detect intent or spot messages that need a reply, then test them in one click.